Monday, September 27, 2010

The Cockpit


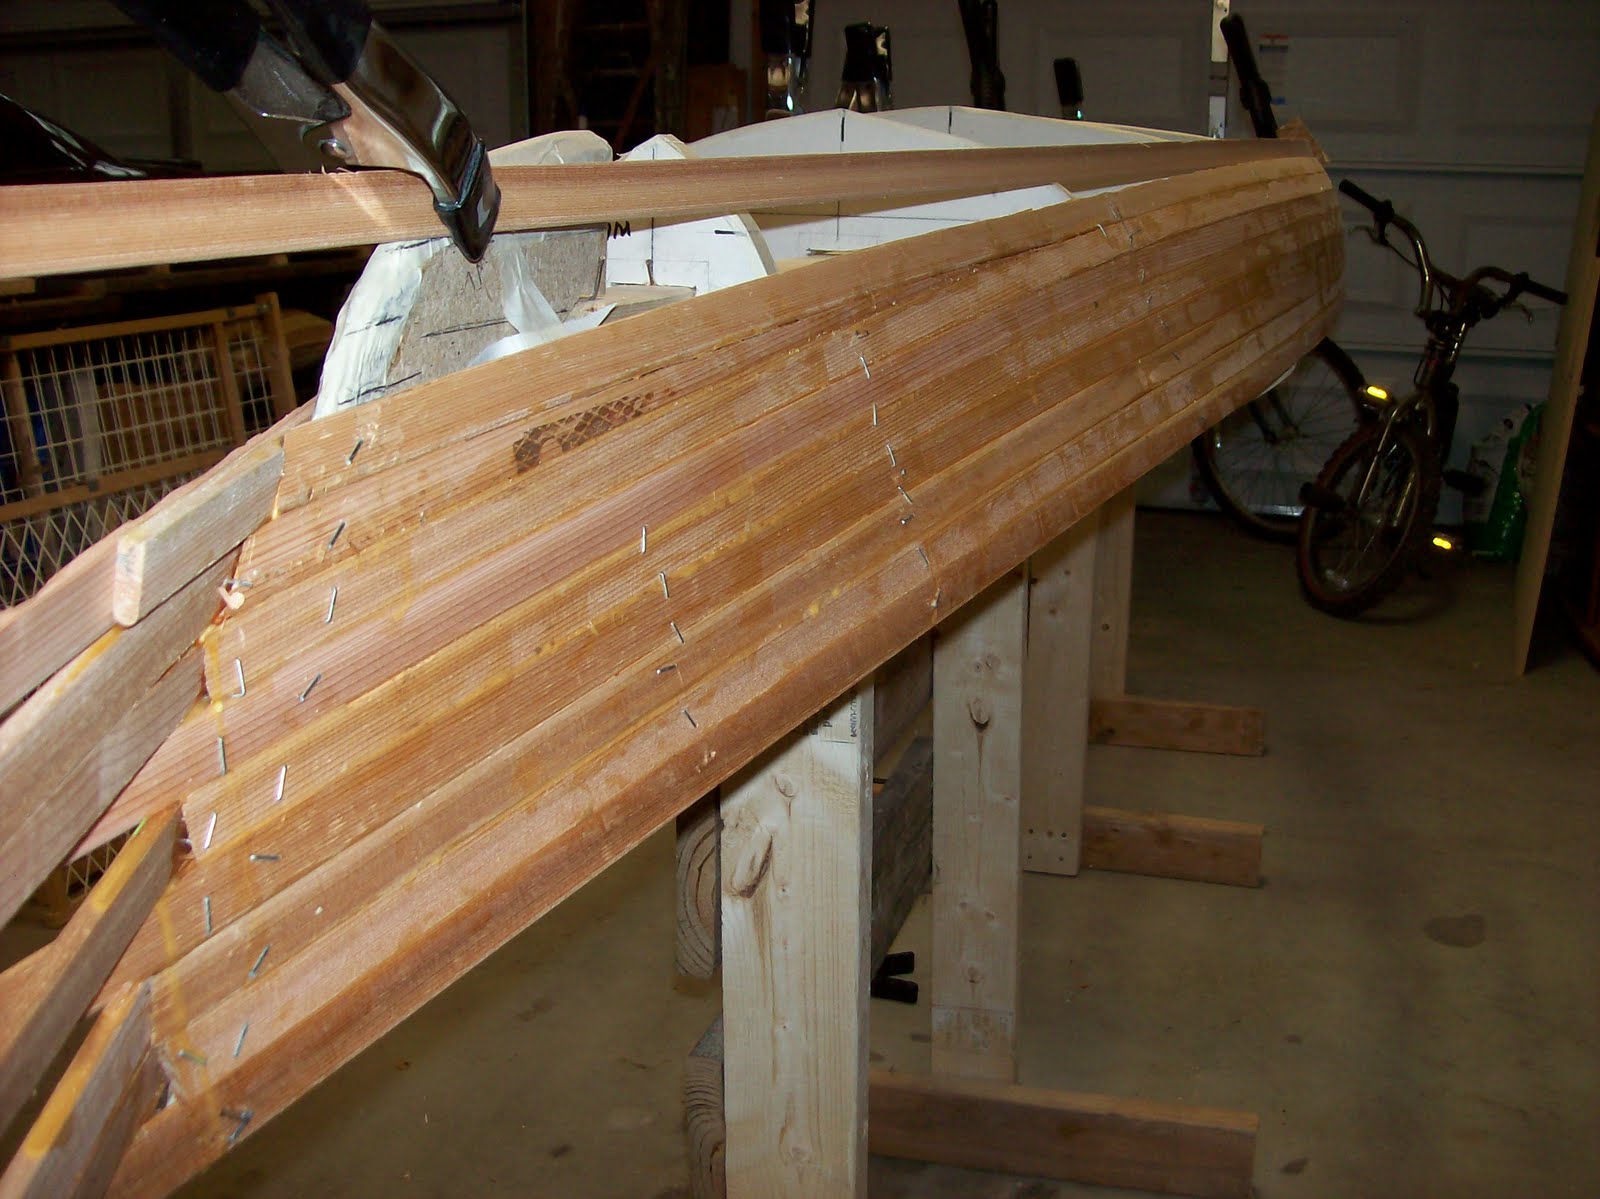
Well I finally got the nerve to cut out the cockpit! I can't believe how much more it looks like a kayak. I need to fill a lot of holes at the shearline, because I should have run the shearline as one strip, but we'll make it work. The photo should show how much of a gap I need to fill... this is in 4 areas of the kayak. After those are filled, I will start working on finishing the cockpit, at least to a point in which I can separate the two halves and begin to think about fiberglassing.

Thursday, September 16, 2010

I have stripped the kayak


Well all of the strips have been layed. I have a lot of clean up to do and a lot of filling, planing and sanding, but it is a major step that I've just made. All-in-all, I think I'll be okay. Need to do some more research on fiberglassing and the proper steps needed to make this all work out.

Sunday, September 12, 2010

Sealing one side


I worked through and finished one side of the kayak. I ran into problems with cutting too close to the kayak. It's easier to trim away from the kayak and then plane in closer the the edges. It looks pretty good, but I have to plane out the mid section to see how it fairs. I will have issues with the deck meeting the hull in a few areas, but I think I will be able go work around it.

The deck


Getting to the shearline has been very tough. I worked down until the strips were not able to lay flat to the hull, and then I layed the shearline strip. I had to lay it in three sections because of the tight curve.

Thursday, September 9, 2010

Building the Deck


The deck seems to be coming along fine. As far as I'm concerned it's a straight path. All the the strips are laying perfectly flat on to the hull. I will be more curious as I reach the the final curve of the kayak to see how I will handle it then... but for now it's all good.

Monday, September 6, 2010

Time for the deck


Well the end pieces held great! I spent Labor Day morning sanding like crazy. There is more filling and sanding I can do, but for now, the kayak is smooth and has a great form, so I decided to flip it over and start working on the deck. I'm starting at the centerline this time and working towards the shearline. My strips are hitting perfectly to the shearline of the hull at this time.

Saturday, September 4, 2010

Wrapping the ends


I've finally pulled all of the staples and have begun to plane and sand. I planed each end of the kayak smooth and planed down a 1/2 inch piece of oak to 1/16" thick at 2' long to wrap around the ends of the kayak. I cracked my first two attempts of wrapping the oak around the bend. I used a blow dryer on my other pieces at the curve and worked fine. I'm now anxious to see if it all holds. My next steps will be to do my final sanding, filling and more sanding. Once complete I will flip the kayak over and start stripping in the deck. I will re-staple at the shearline to keep the hull tight to the forms.

Thursday, August 26, 2010

The Hull Has Been Stripped!


I'm feeling much better now : ) The hull is finally stripped in and the kayak is taking shape. I'll do a little cleanup sanding and planing after I remove most of the staples. Then it will be time to tip it over and start working on the deck.

Sunday, August 22, 2010

Placing the Keel


I went up one more strip and then decided to run my keel strip. This was one of my best moves! Once the keel strip was layed, I worked backward towards the curve. At the keel, the strips layed flat on the forms which made it much easier to work with. I was almost able to finish half of the kayak's hull in one night. Things are looking much better : )

Making the Curve


It's taken me some time to figure out how to round the curve and get my strips closer to the forms. My solution was to go up 3 strips and work back down. The fill in strip was put in with 3 sections... not the very cleanest solution but it got me past the curve.

Monday, August 2, 2010

Pulling away from the forms


Currently, my strips are doing good in the middle of the kayak hitting the forms but the ends are not. Although I don't think that it will make the kayak sink, I will loose some of the sleek form and I will have a tough time pulling the strips around to the keel.

If anyone has advise on how I could finish off the hull and pull my strips in closer to the forms I would appreciate it.

slow progress


I've added my first cheater strips, but may have wanted to add some sooner. My bow is now about 2 strips lower than the stern, and I need to get them evened out.

Sunday, July 25, 2010

Looking good


The kayak is starting to take form!

The stress begins


The first strips went on very smoothly. The farther up the forms I go, the more difficulty I'm finding along the way. I'm using a variety of claps to get the strips as tight as I can against the forms, but some of the very end forms are hard to reach. So now it's time for me to sit back and look at how I want to finish stripping in the hull with different patterns and/or some half with strips.

Begin to Strip in the Kayak


I taped all my forms so the glue would not stick to the forms. I then added my first strip at the shearline. This is where the hull of the kayak and the deck meet. Kip wasn't as excited about the projects as was.

Tuesday, July 20, 2010


I sorted my strips that I purchased from Fox Boat Building into 3 piles, dark, medium and light. This should help when creating the look of the kayak. I then selected my first strips that determine the top from the bottom of the boat (shear strips). I took a plane and planed off the bead side of the strips so they will be flat when I merge top and bottom.

Sunday, July 18, 2010

Let the Building begin


I believe I have everything lined-up and ready to go! I've flipped the kayak upside down so that I will strip the bottom of the kayak first.

Ready to Strip


I'm now at the point where I'm ready to start to strip in the kayak. I've added the final forms and hot glued the tear away portions of the form for where my cockpit will fall (you can see the breakaway in the photo of the 3 middle forms).

I will be purchasing my Western Red Cedar Strips from http://www.cfoxwoodboats.com/ Tim the owner has been very helpful and I will be purchasing most of my supplies from him.

Wednesday, July 7, 2010


You'll notice on the bow for the strongback in cut to a "V". That is to keep the form solid through contruction (I believe), the stern form uses the full 2x4. I just need to add the final form pieces the bow and stern and then I'm almost ready to strip in the wood.

Once I had all of my measurements completed, checked and double-checked, I secured all of the forms to the strongback with pieces of wood as shown here. I then drill a screw on the other side through the form and into the strongback to secure them.

Because I am going with the 11 foot Little Auk, I had to re-cut my forms a little larger. The spacing between forms is now going to be 13 3/16" apart. The first form form the tip of the bow and end of the stern will be at 6". I had sand the bow and stern forms to a point before attaching to the strongback.

Wednesday, June 9, 2010


I re-adjusted the size of the holes for my strongback and re-marked the waterline, sheerline and centerpoint lines. After drilling two holes in the area where the 2x4 goes, I cut out the holes for the strongback. I slid all of the pieces into place on the stongback for position. My next step will be to mark all the areas I need to fix on my forms and then mark my centerline on the strongback and the distance between each form. I will also need to cut new forms for the stern and bow, because I am going to build the 11 foot vs the 10 foot Little Auk. So far, so good.

Monday, June 7, 2010


Cutting out the forms ended up being a little bit of a hassle as the patterns kept coming away from the board. I was able use some duct tape to secure edges and re-spray mount some of the pieces. I wanted to make sure to mark the waterline, centerline and sheerline. The next steps will involve cutting out the holes for the stongback and smoothing out rough spots on the forms. The pattern calls for a larger hole than expected, so I am going to reduce the size to fit a 2x4 snuggly.

I then cutout the patterns and spray mounted them to 1/2" particalboard. I was almost able to fit the full kayak on to one 4' x 4' sheet.

My next step was to trace the full size forms that I purchased from Guillemot Kayaks, so that if something happened, I always will have a backup.

My first step was to create a stand. The stand I built is from the book "The Strip-Built Sea Kayak" by Nick Schade. I still need to do some modification, because I placed my top support a little to high. It will act as a support for the initial build and later as a boat cradle.

Dave's First Strip Built Kayak

I am creating this blog to keep my friends and family up-to-date with the progress of my adventures in kayak building.

I will be building a Guillemot Little Auk. The plans are for a 10' version, but I will be stretching it to an 11' foot version. I still have so much to learn about the lingo and various watercraft specifications, but hope to learn as go along.

But first, I need to learn how to blog : )