Sunday, July 10, 2011

Ta-Da!


Still a few things to do, but I was able to kayak the whole lake on Saturday, July 9th. I will put a spar varnish on it yet and also pour epoxy in the bow and stern ends of the kayak for more strength.

Wednesday, July 6, 2011

Finishing the Coaming


I created the coaming lip in two halves with 3 strips each of 1/16" thick oak and black walnut at about 3/8" width. I would glue on a strip and let it dry and then repeat. I was able to finish in a day. When it came to fiberglassing the coaming lip.... that's another story. I worked like very hard on getting the glass to lay around the lip on the outside, but I had bubbling problems like crazy. I ended up removing the fiberglass cloth and just coating with the epoxy resin. I will coat it a few times and test the strength and waterproof ability and then decide on what to do.

Joining the Hull and the Deck


Merging the top and bottom of the kayak was interesting. I started from the bow and worked back to the stern. I used a good packing tape with fibers to hold it together. I was not able to get the stern end out far enough to match, but was able to plane down the deck to meet after I glassed the inside seam. Rolling the fiberglass cloth that was pre-rolled with the epoxy mix was not too bad until the very end of the kayak, then the fibers kept attaching to the brush-on-a-stick.

Sunday, June 26, 2011

Glassing the Hull Inside


I trimmed off the excess wood strips from the bottom of the cockpit coaming. I left a little ridge between the deck and the coaming, but I should have sanded right to the deck because the ridge left air bubbles when I glassed it. Fiberglassing the inside of the hull was a real challenge. I faced a lot of air bubbles, and the bow and stern where very hard to wet in. I was somewhat frustrated at the end of the session, which took about 3 hours, but when I came back to it later, it didn't look as bad as I thought. Plus, much will be in areas you'll never see when all said and done.

Sunday, June 19, 2011

Glassing the Cockpit and Fill Coat the Deck


I wanted to start the outside of the cockpit to add strength to it, as I found it to be a little loose when sanding. After the outside of the deck is completely dried, I will start sanding and trimming the length of the wood strips at the bottom, so that I can glass the inside of the cockpit. You can see a little amine blush on the edges of the cockpit where I taped it off. I washed it down with warm water, let dry, then added the fill coat. Everything covered very well and I'm pretty happy with the results.

Sunday, June 12, 2011

Removing forms and building the cockpit


Earlier this week I got brave and removed the forms from the hull. Surprisingly, they came out quite easy. The stern piece was lodged in pretty good, but with a little patience and wiggling, it came out fine. When creating the coaming for the cockpit, I needed to stay focused on keeping the strips vertical. There were a few areas where the strips started to get a tilt to them, so I would start in a different area of the cockpit and when they met up, I would put a wedge piece to finish. The glue gun was a life-saver in keeping the pieces in place.

Saturday, June 4, 2011

The Big Day


Today was quite productive. I put a second coat of fiberglass cloth on the keel, bow and stern of the kayak. I taped off exactly where I wanted it to cover and used a roller, sponge paintbrush and a squeegee to lay down the epoxy. It is much tougher to cover a second layer of glass, so you have to be persistent on wetting it in. Also note how I finished the ends of the kayak, by folding over the fiberglass wetting it down and folding the other way. It worked, but I don't know if it was the best solution. I then went on to fiberglass the bottom of the deck. I ran out of fiberglass from my roll, but had enough pieces to cover it. I'll need to buy more fiberglass to finish the inside of the hull and the cockpit. I then used an exacto to cut next to the tape and remove the excess fiberglass and tape. After that I applied my first fill coat to the kayak. It is amazing to see the difference that makes to the look of your kayak!! It was a very exciting day... now I can start thinking about the cockpit and removing the forms from the hull.

Sunday, May 29, 2011

Fiberglassing the Deck


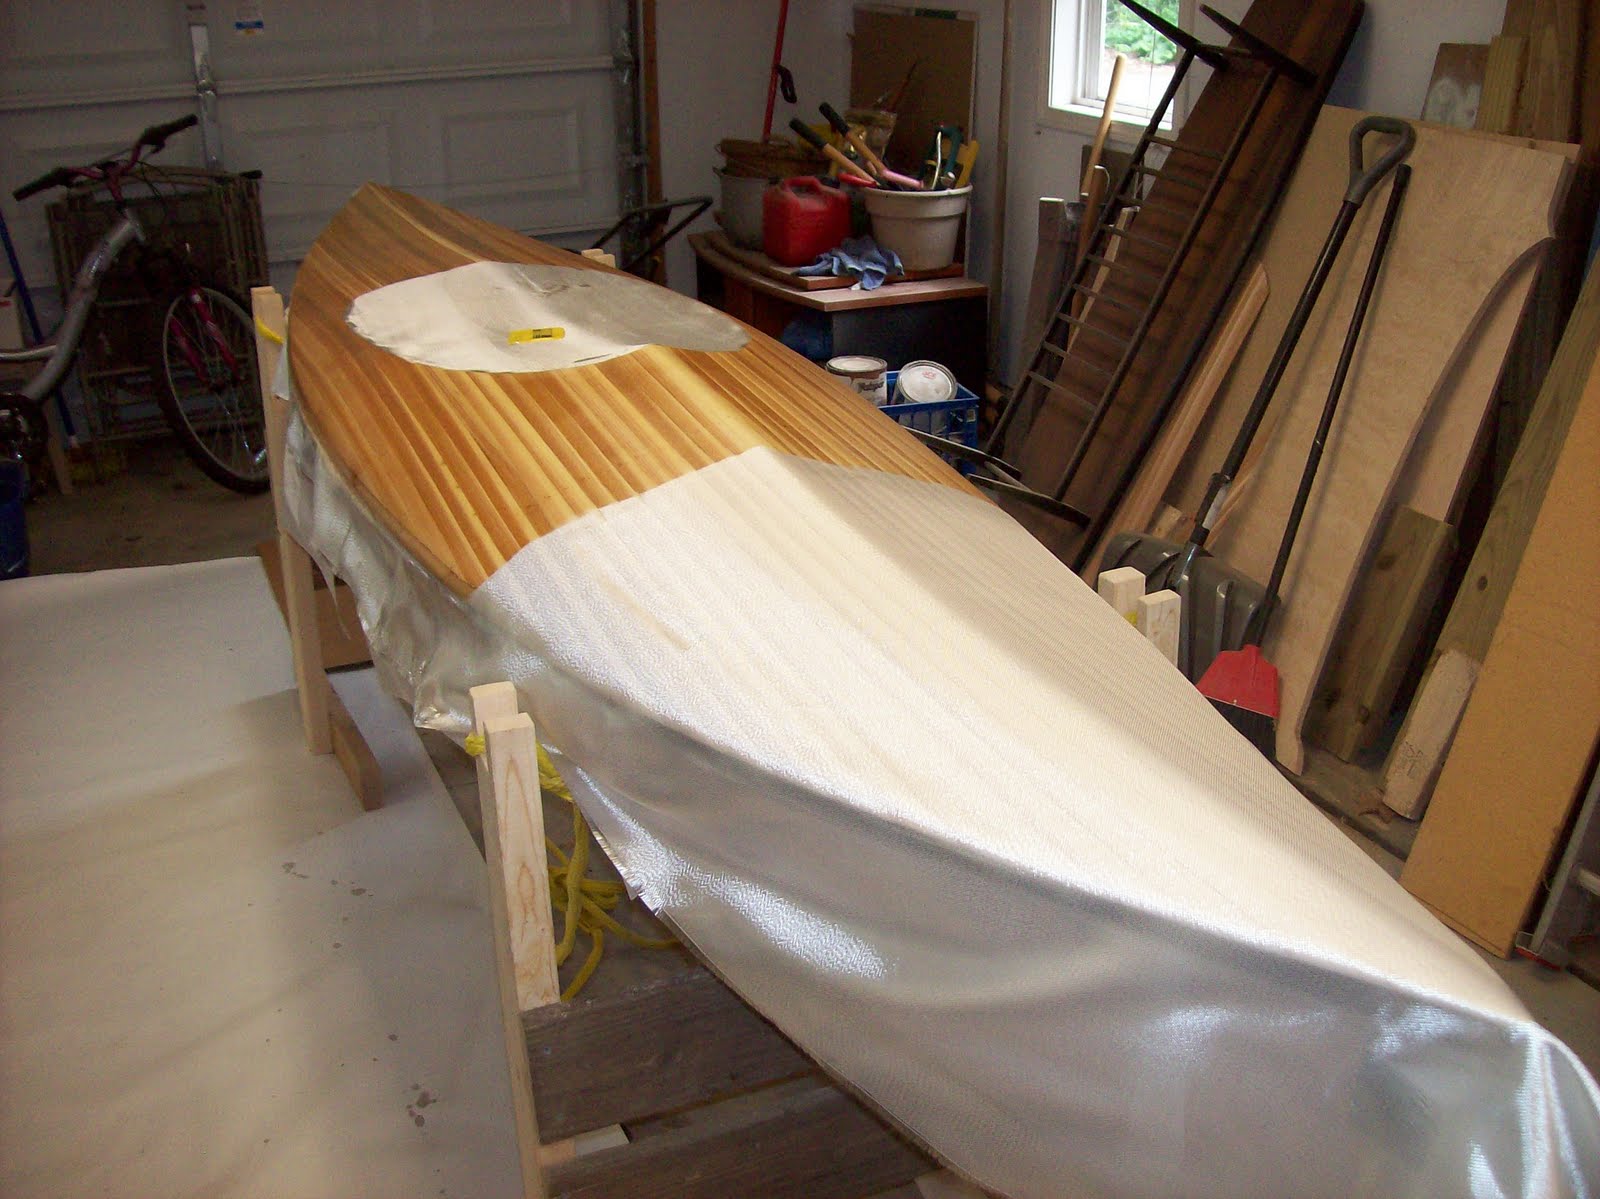
I first layed wax paper down so that I would not get any epoxy on the hull. The way I stripped the deck in, with no shear strip at the bow and stern of the kayak may cause a problem because the curve is very tight. I worked with the epoxy and fiberglass a lot as it cured to try and get the glass to lay as tight as possible on the strong curves. All-in-all it looks pretty good, and after I join the deck and hull together, I will be running a 4" strip of glass over the joint on the outside and inside of the kayak. Tomorrow I will start to work on the combing.

Sunday, May 22, 2011

Fiberglass Prep


I've been very nervous to do the fiberglassing, so I did a test piece on the cut-out of the cockpit. Turned out not to be as bad as expected. After the test worked, I rolled out my fiberglass onto the kayak and then used a paintbrush to work the cloth smooth to the kayak. The actual fiberglassing of the boat took about an hour of none stop moving. I used a slow cure hardener and had plenty of time to work. I used MAS for both my Resin and Hardener. The bow and stern are the toughest areas because you need to trim the fiberglass to overlap them. I will be putting a second coat of fiberglass there anyway so it will be fine. My fear of fiberglassing is much less now... can't wait to do the deck!

Tuesday, May 10, 2011

Back from a Winter Rest


During the winter season I wrapped the kayak to keep the shape together. I don't know if really made a difference, but it didn't hurt. The long sanding board was very helpful in the sanding the kayak. I'm currently doing a lot of sanding and think I'm close to fiberglassing. I just purchased my 4 oz. cloth from SystemThree.com Today I split the deck from the hull. It was really nerve racking, but with a little steps I got it removed. I will start with fiberglassing the hull.... hopefully next week.

Monday, September 27, 2010

The Cockpit


Well I finally got the nerve to cut out the cockpit! I can't believe how much more it looks like a kayak. I need to fill a lot of holes at the shearline, because I should have run the shearline as one strip, but we'll make it work. The photo should show how much of a gap I need to fill... this is in 4 areas of the kayak. After those are filled, I will start working on finishing the cockpit, at least to a point in which I can separate the two halves and begin to think about fiberglassing.

Thursday, September 16, 2010

I have stripped the kayak


Well all of the strips have been layed. I have a lot of clean up to do and a lot of filling, planing and sanding, but it is a major step that I've just made. All-in-all, I think I'll be okay. Need to do some more research on fiberglassing and the proper steps needed to make this all work out.

Sunday, September 12, 2010

Sealing one side


I worked through and finished one side of the kayak. I ran into problems with cutting too close to the kayak. It's easier to trim away from the kayak and then plane in closer the the edges. It looks pretty good, but I have to plane out the mid section to see how it fairs. I will have issues with the deck meeting the hull in a few areas, but I think I will be able go work around it.

The deck


Getting to the shearline has been very tough. I worked down until the strips were not able to lay flat to the hull, and then I layed the shearline strip. I had to lay it in three sections because of the tight curve.

Thursday, September 9, 2010

Building the Deck


The deck seems to be coming along fine. As far as I'm concerned it's a straight path. All the the strips are laying perfectly flat on to the hull. I will be more curious as I reach the the final curve of the kayak to see how I will handle it then... but for now it's all good.

Monday, September 6, 2010

Time for the deck


Well the end pieces held great! I spent Labor Day morning sanding like crazy. There is more filling and sanding I can do, but for now, the kayak is smooth and has a great form, so I decided to flip it over and start working on the deck. I'm starting at the centerline this time and working towards the shearline. My strips are hitting perfectly to the shearline of the hull at this time.

Saturday, September 4, 2010

Wrapping the ends


I've finally pulled all of the staples and have begun to plane and sand. I planed each end of the kayak smooth and planed down a 1/2 inch piece of oak to 1/16" thick at 2' long to wrap around the ends of the kayak. I cracked my first two attempts of wrapping the oak around the bend. I used a blow dryer on my other pieces at the curve and worked fine. I'm now anxious to see if it all holds. My next steps will be to do my final sanding, filling and more sanding. Once complete I will flip the kayak over and start stripping in the deck. I will re-staple at the shearline to keep the hull tight to the forms.

Thursday, August 26, 2010

The Hull Has Been Stripped!


I'm feeling much better now : ) The hull is finally stripped in and the kayak is taking shape. I'll do a little cleanup sanding and planing after I remove most of the staples. Then it will be time to tip it over and start working on the deck.

Sunday, August 22, 2010

Placing the Keel


I went up one more strip and then decided to run my keel strip. This was one of my best moves! Once the keel strip was layed, I worked backward towards the curve. At the keel, the strips layed flat on the forms which made it much easier to work with. I was almost able to finish half of the kayak's hull in one night. Things are looking much better : )